Q1: Can I remove a 301 redirect without any negative impact on my website?
What is a 301 Redirect?
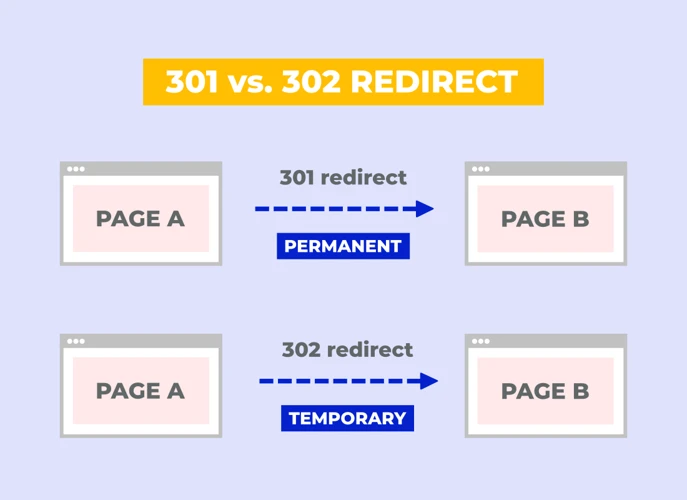
A 301 redirect is a type of HTTP status code that is used to permanently redirect one URL to another. When a website or webpage is redirected using a 301 redirect, it informs search engines and browsers that the original URL has been permanently moved to a new location. This helps to ensure that users and search engines are directed to the correct webpage, even if they have bookmarked or linked to the old URL. The “301” in the redirect code refers to the HTTP status code for a permanent redirect. Unlike temporary redirects (such as a 302 redirect), a 301 redirect is considered a permanent solution. It is important to note that a 301 redirect passes on the link equity from the old URL to the new one, meaning that search engines will attribute the ranking signals and authority of the old URL to the new URL. This can be beneficial for maintaining search engine rankings and ensuring a seamless user experience. However, there may be instances where you need to remove a 301 redirect for various reasons, such as website restructuring or redesign, eliminating unnecessary redirects, or optimizing your SEO strategy. In the following sections, we will provide you with a step-by-step guide to removing a 301 redirect, as well as address common challenges and troubleshooting tips that you may encounter along the way. So, let’s get started!
Why Remove a 301 Redirect?
There are several reasons why you may need to remove a 301 redirect. Firstly, website restructuring or redesign may require you to update your URLs and remove the old redirect to ensure a more organized and user-friendly website structure. Secondly, eliminating unnecessary redirects can improve website performance and reduce the load time for users. By removing redirects that are no longer needed, you can streamline the user experience and prevent any potential issues or errors. Lastly, removing a 301 redirect may be necessary for SEO optimization. If you want to change the target URL for a specific page or improve your website’s search engine rankings, removing the old redirect and implementing a new one can be beneficial. By following the steps outlined in this guide, you’ll be able to successfully remove a 301 redirect and achieve your desired website goals.
Reason 1: Website Restructuring or Redesign
Reason 1: Website Restructuring or Redesign
Website restructuring or redesign is a common reason for removing a 301 redirect. As businesses evolve and grow, they may need to make changes to their website’s structure or design to accommodate new products, services, or branding strategies. When implementing these changes, it is important to update the URLs accordingly to ensure a seamless user experience and maintain search engine rankings. Removing a 301 redirect allows you to reorganize your website’s architecture and create new URLs that align with your updated website structure. This can help improve user navigation, make it easier for search engines to crawl and index your pages, and enhance overall website performance. However, it is crucial to properly plan and execute the website restructuring or redesign process to avoid any negative impact on your SEO efforts. Make sure to create a comprehensive redirection plan, update internal links to reflect the new URLs, and inform search engines about the changes through sitemap submission or URL inspection tools. By following these steps, you can successfully remove the 301 redirect and optimize your website for improved user experience and search engine visibility.
Reason 2: Eliminate Unnecessary Redirects
Reason 2: Eliminate Unnecessary Redirects
One of the main reasons to remove a 301 redirect is to eliminate unnecessary redirects. Redirects can impact website performance by adding additional time for the browser to process the redirect and load the new page. This can result in slower page load times, which can negatively affect user experience and potentially lead to higher bounce rates. By removing unnecessary redirects, you can streamline the user journey and improve overall website speed and performance.
To identify unnecessary redirects, you can utilize tools such as Google Search Console or third-party SEO auditing tools. These tools can provide insights into the number of redirects on your website and highlight any redirects that are deemed unnecessary. Once identified, you can evaluate the purpose and relevance of each redirect. If a redirect is not serving a specific purpose or is redirecting to a page that is no longer relevant, it may be a good idea to remove it.
By eliminating unnecessary redirects, you can create a more efficient website structure and improve user experience. This can lead to higher engagement, increased conversions, and improved SEO performance. So, take the time to evaluate your redirects and remove any that are unnecessary to optimize your website’s performance.
If you’re interested in learning more about optimizing your website, check out our guide on how to get backlinks indexed.
Reason 3: SEO Optimization
Reason 3: SEO Optimization
SEO optimization is a crucial aspect of any website’s success. When it comes to 301 redirects, there are a few ways in which removing them can contribute to improving your SEO strategy:
1. **Page Speed**: Having unnecessary redirects can slow down your website’s loading speed, which can negatively impact user experience and search engine rankings. By removing 301 redirects, you can improve your website’s performance and load times, leading to better user engagement and potentially higher rankings in search engine results.
2. **Link Juice**: As mentioned earlier, a 301 redirect passes on link equity from the old URL to the new one. However, if you have multiple redirects in place, this can dilute the link juice and affect the overall authority and ranking potential of your pages. By removing unnecessary redirects, you can consolidate link equity and ensure that it is focused on the most relevant and important pages on your website.
3. **Crawl Efficiency**: Search engine bots crawl websites to index their pages. The more redirects they encounter, the longer it takes for them to reach the final destination. By removing unnecessary 301 redirects, you can improve crawl efficiency, allowing search engines to index your pages more effectively. This can lead to better visibility and rankings in search engine results.
By considering these SEO optimization benefits, you can see why it is important to remove unnecessary 301 redirects from your website. In the next section, we will provide you with a step-by-step guide to help you remove these redirects effectively. So, let’s continue with the process!
Step-by-Step Guide to Remove 301 Redirect
To remove a 301 redirect, follow these step-by-step instructions:
1. Identify the Redirects: Begin by identifying all the URLs that have been redirected using a 301 redirect. This can be done by checking the .htaccess file or using a website crawler tool.
2. Assess the Impact: Evaluate the impact of removing the redirect on your website’s traffic, rankings, and user experience. Make sure to consider any potential consequences before proceeding.
3. Update Internal Links: Update all internal links on your website that point to the redirected URL. Replace them with the new URL to ensure that users and search engines are directed to the correct page.
4. Update External Links: Reach out to external websites that have linked to the redirected URL and request them to update their links to the new URL. This will help maintain link equity and prevent any loss in traffic or rankings.
5. Update XML Sitemaps: Update your XML sitemap to reflect the changes made. Include the new URL and remove the old redirected URL to ensure search engines can crawl and index the correct pages.
6. Monitor Crawl Errors: Monitor your website’s crawl errors in Google Search Console or other SEO tools. Check for any errors related to the removed redirect and address them promptly.
7. Remove Redirect Code: Finally, remove the 301 redirect code from your .htaccess file or server configuration. This will ensure that the old URL no longer redirects to the new URL.
By following these steps, you can successfully remove a 301 redirect and ensure that your website is optimized for improved SEO and user experience. For more information on related topics, such as how to tag in YouTube or how to fix indexed pages blocked by robots.txt, check out our other helpful articles.
Step 1: Identify the Redirects
Step 1: Identify the Redirects
The first step in removing a 301 redirect is to identify the redirects that are currently in place on your website. To do this, you can use various tools and methods. One way is to analyze your website’s server logs to see if any redirect codes, such as 301 or 302, are present. Another method is to use online redirect checker tools that can scan your website and provide a list of all redirects detected. Additionally, you can use Google Search Console to identify any redirects that have been indexed by search engines. This tool can provide valuable insights into the redirects that are affecting your website’s visibility. Once you have identified the redirects, make a note of the URLs that are being redirected and the destination URLs they are redirected to. This information will be useful in the subsequent steps of the removal process. Now that you have identified the redirects, let’s move on to step 2: assessing the impact.
Step 2: Assess the Impact
Step 2: Assess the Impact
Before removing a 301 redirect, it is crucial to assess the potential impact it may have on your website. This step involves evaluating the current traffic, rankings, and user experience associated with the redirected URL. By understanding the impact of the redirect, you can make informed decisions and minimize any negative consequences.
Here’s how to assess the impact of removing a 301 redirect:
1. Analyze Website Analytics: Review your website’s analytics data to identify the amount of traffic, engagement metrics, and conversions associated with the redirected URL. This will help you gauge the importance of the redirect and its impact on your website’s performance.
2. Consider SEO Rankings: Evaluate the rankings of the redirected URL in search engine results pages (SERPs). Look for keywords and phrases that drive organic traffic to the URL. Removing the redirect may affect your rankings for those keywords, so it’s important to consider the potential impact on your SEO strategy.
3. Evaluate User Experience: Assess how the redirect affects the user experience on your website. If the redirected URL provides valuable content or functionality, removing the redirect may result in a negative user experience. Consider alternative solutions to maintain a seamless and intuitive user journey.
4. Identify Backlinks: Examine the backlinks pointing to the redirected URL. Backlinks are valuable for SEO, as they contribute to your website’s authority and rankings. Removing the redirect may cause the loss of these valuable backlinks. Consider redirecting the backlinks to a relevant page on your website to preserve their SEO value.
By thoroughly assessing the impact of removing a 301 redirect, you can make informed decisions and mitigate any potential negative effects. Remember to carefully analyze your website analytics, SEO rankings, user experience, and backlink profile before proceeding with the removal process.
Step 3: Update Internal Links
Step 3: Update Internal Links
Once you have identified the redirects and assessed their impact, the next step is to update the internal links on your website. Internal links are hyperlinks that point to other pages within the same domain. These links play a crucial role in navigation and SEO optimization.
To update internal links, follow these steps:
1. Identify the pages that contain the old redirected URLs. You can use tools like Google Search Console or a website crawler to find these pages.
2. Replace the old redirected URLs with the new URLs in the anchor text of the internal links. Make sure to update the links on all relevant pages, including menus, footers, sidebars, and within the content itself.
3. Test the updated links to ensure they are functioning correctly. Click on each link to verify that it redirects to the intended page without any issues.
4. Update any internal linking structures, such as breadcrumbs or site navigation menus, to reflect the changes made.
By updating the internal links, you ensure that visitors can navigate your website seamlessly and that search engines can crawl and index the new URLs effectively. Additionally, updating internal links helps to maintain the flow of link equity and authority within your website, contributing to overall SEO performance.
Remember to regularly monitor your website for any broken or outdated internal links and fix them promptly to provide the best user experience.
Step 4: Update External Links
Step 4: Update External Links
Once you have updated the internal links on your website, it is essential to also update any external links that point to the old URL. External links are links from other websites that direct users to your website. These links play a crucial role in your website’s visibility and search engine rankings. When a 301 redirect is in place, external links to the old URL will still redirect users to the new URL. However, it is best practice to update these external links to point directly to the new URL.
To update external links, you can reach out to the website owners or administrators who have linked to your old URL and request them to update the link. Be polite and provide them with the new URL, explaining the reason for the change. Additionally, you can use tools like Ahrefs or Google Search Console to identify the external websites linking to your old URL. Once you have identified these websites, you can manually update the links or contact the website owners for assistance. Updating external links not only helps maintain a consistent user experience but also ensures that search engines can accurately attribute link equity to the new URL, further boosting its authority and rankings.
So, don’t forget to update external links to ensure a seamless transition from the old URL to the new one.
Step 5: Update XML Sitemaps
Step 5: Update XML Sitemaps
Updating your XML sitemaps is an important step in removing a 301 redirect. XML sitemaps are files that help search engines understand the structure and organization of your website. They contain a list of all the URLs on your site that you want to be crawled and indexed by search engines.
To update your XML sitemaps, follow these steps:
1. Identify the XML sitemap files: Typically, XML sitemap files are named “sitemap.xml” and are located in the root directory of your website. However, depending on your website’s setup, you may have multiple XML sitemap files.
2. Open the XML sitemap files: Using a text editor or an XML sitemap generator tool, open the XML sitemap files for editing.
3. Locate the URLs with the old redirect: Search for the URLs that were previously redirected using the 301 redirect. These URLs will need to be updated to reflect the new URLs.
4. Replace the old URLs with the new URLs: Replace the old redirected URLs with the corresponding new URLs. This ensures that search engines will crawl and index the correct URLs.
5. Save and update the XML sitemap files: After making the necessary updates, save the XML sitemap files and upload them to your website’s root directory. Alternatively, if you are using a content management system (CMS) or a plugin, follow the platform-specific instructions to update and regenerate your XML sitemaps.
Updating your XML sitemaps helps search engines discover and crawl the new URLs on your website, ensuring that they are properly indexed. This is crucial for maintaining your website’s visibility and ensuring that users can find your content easily. Remember to submit your updated XML sitemaps to search engines via their respective webmaster tools to expedite the crawling and indexing process.
Step 6: Monitor Crawl Errors
Step 6: Monitor Crawl Errors
Once you have removed the 301 redirect, it is crucial to monitor crawl errors on your website. Crawl errors occur when search engines encounter issues while trying to access and index your webpages. These errors could be a result of broken links, server errors, or other technical issues that could negatively impact your website’s visibility and SEO performance. By regularly monitoring crawl errors, you can quickly identify and resolve any issues that may arise after removing the redirect.
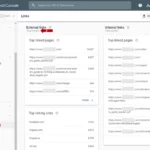
To monitor crawl errors, you can utilize Google Search Console, a free tool provided by Google that allows you to monitor your website’s performance and identify any issues. Simply log in to your Google Search Console account and navigate to the “Coverage” section. Here, you will find a list of URLs that have encountered errors during the crawling process. Pay close attention to any URLs that were previously redirected and ensure that they are now accessible and error-free.
Additionally, it is important to regularly check your website’s server logs for any crawl errors that may not be captured by Google Search Console. Server logs provide valuable information about how search engines are crawling your website and can help identify any potential issues or patterns. If you notice any recurring crawl errors, it is recommended to investigate and address them promptly to ensure that your website is being properly indexed.
By monitoring crawl errors, you can stay proactive in maintaining the health and visibility of your website. This step is crucial in ensuring that search engines can effectively crawl and index your webpages, ultimately improving your website’s performance in search engine rankings. So, make sure to regularly check for crawl errors and take necessary actions to resolve any issues that arise.
Now that you’ve learned about monitoring crawl errors, let’s move on to the next step in the process of removing a 301 redirect.
Step 7: Remove Redirect Code
Step 7: Remove Redirect Code
Once you have updated all internal and external links, and ensured that your XML sitemaps are up to date, it’s time to remove the redirect code from your website. Removing the redirect code will allow the old URL to no longer redirect to the new URL, effectively eliminating the 301 redirect.
To remove the redirect code, follow these steps:
1. Access your website’s backend or content management system (CMS).
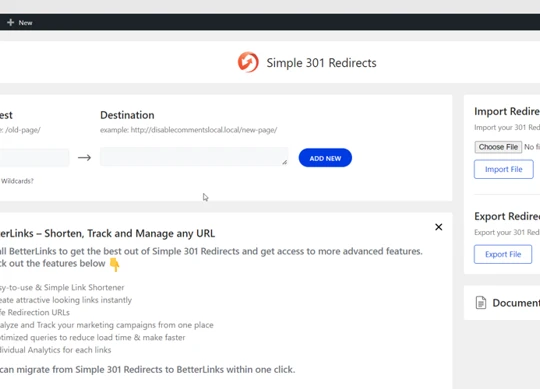
2. Locate the file or section where the redirect code is implemented. This could be in the .htaccess file, a plugin, or directly in the code of your website.
3. Open the file or section and find the line of code that corresponds to the 301 redirect you want to remove.
4. Delete or comment out the line of code that contains the redirect code. This will depend on the specific setup of your website or CMS.
5. Save the changes to the file or section.
6. Test the removal of the redirect code by accessing the old URL in a browser. It should no longer redirect to the new URL.
It’s important to note that when removing the redirect code, you should also consider updating any related rules or configurations that may have been set up alongside the redirect. This could include redirects for specific pages or directories, or any other custom redirect setups.
By removing the redirect code, you are effectively undoing the redirection and allowing the old URL to stand on its own. This is particularly useful if you no longer require the redirect or if you want to restore the original URL for any reason.
Remember to monitor the website’s performance and crawl errors after removing the redirect code to ensure that everything is functioning correctly. This will help you identify any potential issues and address them promptly.
Now that you’ve successfully removed the redirect code, your website should no longer have any active 301 redirects. This will not only improve the user experience but also help search engines properly index and rank your webpages. Keep in mind that removing a 301 redirect should be done deliberately and with caution, as it can have implications on your website’s SEO.
Common Challenges and Troubleshooting
When it comes to removing a 301 redirect, there are a few common challenges and troubleshooting tips that you may encounter along the way. One challenge you may face is when you are changing domain names. This can be a complex process as you need to ensure that all the old URLs are redirected to the new domain properly. It is crucial to update internal and external links, as well as XML sitemaps, to reflect the new domain. Another challenge is handling backlinks. If there are any backlinks pointing to the old URL, it is important to reach out to the webmasters and request that they update their links to the new URL. Additionally, dealing with cached pages can be a challenge. Even after removing the redirect, search engines may still have cached versions of the old URL. In this case, you can request the removal of the cached page through the search engine’s webmaster tools. By addressing these challenges and following the troubleshooting tips, you can ensure a smooth transition and maintain the visibility and integrity of your website.
Challenge 1: Changing Domain Names
When it comes to changing domain names, there are several challenges that you may encounter. One of the main challenges is ensuring that all the necessary redirects are in place to direct users and search engines to the new domain. This involves setting up a 301 redirect from the old domain to the new domain. Additionally, you will need to update all internal links within your website to point to the new domain. This can be a time-consuming process, especially if you have a large website with numerous pages. It is important to thoroughly test all the redirects and links to ensure that they are functioning correctly. Another challenge is updating external links to the new domain. This includes reaching out to other website owners and requesting them to update any backlinks they have to your old domain with the new domain. It is important to maintain a good relationship with other website owners and provide them with any necessary information or resources to make the process easier for them. Additionally, you may need to update any XML sitemaps that you have submitted to search engines, ensuring that they include the new domain. This will help search engines discover and index your new domain more efficiently. Changing domain names can be a complex process, but with careful planning and execution, you can minimize any negative impact on your website’s SEO and ensure a smooth transition to the new domain.
Challenge 2: Handling Backlinks
Challenge 2: Handling Backlinks
One of the challenges you may encounter when removing a 301 redirect is how to handle backlinks. Backlinks are incoming links from other websites that direct users to your website. These backlinks are important for SEO as they can contribute to your website’s authority and search engine rankings.
When you remove a 301 redirect, the backlinks that were previously pointing to the redirected URL will now be pointing to the new URL. This can be advantageous as it helps to consolidate the link equity and authority to a single URL. However, it’s crucial to ensure that all backlinks are updated to point directly to the new URL to avoid any potential loss of traffic or authority.
To handle backlinks effectively, you should take the following steps:
1. Identify the backlinks: Use tools like Google Search Console or third-party backlink analysis tools to identify the backlinks pointing to the redirected URL.
2. Contact website owners: Reach out to the owners of the websites linking to the redirected URL and request them to update the backlinks to the new URL. Provide them with the updated URL and any necessary information they may need to update the links.
3. Redirect the backlinks: If it’s not possible to update the backlinks manually, you can redirect the backlinks from the old URL to the new URL using a 301 redirect. This will ensure that any traffic coming from those backlinks will still be directed to the correct webpage.
4. Monitor and update: Regularly monitor your backlink profile to ensure that all backlinks are updated and pointing to the correct URLs. Use tools like Ahrefs or Moz to keep track of any changes in your backlink profile.
Handling backlinks can be a time-consuming process, but it’s essential for maintaining your website’s authority and search engine rankings. By taking the necessary steps to handle backlinks properly, you can ensure a smooth transition when removing a 301 redirect.
Challenge 3: Dealing with Cached Pages
Dealing with cached pages can pose a challenge when removing a 301 redirect. Cached pages are copies of webpages that are stored by search engines or browsers. These copies are created to improve loading times and provide users with access to webpages even if the original server is experiencing downtime. When a 301 redirect is in place, search engines and browsers may continue to serve the cached version of the redirected page, even after the redirect has been removed. This can lead to confusion for users who are expecting to see the updated content. To address this challenge, you can take the following steps:
- Clear the cache: Instruct search engines and browsers to clear their cache for the affected pages. This can be done by submitting a request through the search engine’s webmaster tools or clearing the cache in the browser settings.
- Request reindexing: Submit a request to search engines to reindex the updated pages. This can help ensure that the latest version of the page is crawled and indexed.
- Communicate with users: If you have control over the website or webpage, consider displaying a message to users informing them that the page has been updated and to clear their cache if they are still seeing the old content.
By following these steps, you can help mitigate the challenges associated with cached pages and ensure that users are directed to the most up-to-date version of your webpages. For more information on dealing with other SEO-related challenges, check out our guide on how to fix indexed though blocked by robotstxt.
Conclusion
In conclusion, removing a 301 redirect can be a crucial task for website owners who are looking to restructure their site, eliminate unnecessary redirects, or optimize their SEO strategy. By following the step-by-step guide outlined in this article, you can easily identify and assess the impact of the redirects, update internal and external links, and monitor crawl errors to ensure a smooth transition. Additionally, we have provided solutions for common challenges such as changing domain names, handling backlinks, and dealing with cached pages. Remember, removing a 301 redirect should be done carefully and with proper planning to avoid any negative impact on your website’s search engine rankings and user experience. By implementing these strategies, you can effectively remove unwanted redirects and improve the overall performance and visibility of your website. For more information on optimizing your online presence, check out our article on how to tag in YouTube.
Frequently Asked Questions
FAQs about Removing 301 Redirects
Q1: Can I remove a 301 redirect without any negative impact on my website?
A1: Yes, you can remove a 301 redirect without any negative impact on your website. However, it is important to carefully assess the impact and update any internal and external links to ensure a smooth transition.
Q2: How do I identify the redirects on my website?
A2: You can identify redirects by using tools like Screaming Frog or Google Search Console. These tools can help you crawl your website and identify any redirect chains or loops.
Q3: What should I consider when assessing the impact of removing a 301 redirect?
A3: When assessing the impact, consider factors such as traffic patterns, backlinks, and the relevance of the old URL. This will help you determine if removing the redirect will have any negative consequences.
Q4: How do I update internal links?
A4: To update internal links, you will need to locate the old URLs and replace them with the new ones. This can be done manually or using tools like find and replace in your content management system.
Q5: What should I do about external links pointing to the old URL?
A5: For external links, reach out to the website owners and request them to update the links to the new URL. You can also consider implementing a 301 redirect from the old URL to the new one.
Q6: How do I update XML sitemaps?
A6: To update XML sitemaps, locate the old URLs and replace them with the new ones. Once updated, submit the new XML sitemap to search engines for indexing.
Q7: How do I monitor crawl errors?
A7: Monitor crawl errors by regularly checking your website’s crawl error reports in Google Search Console. This will help you identify any issues with the removal of the 301 redirects.
Q8: How do I remove the redirect code?
A8: To remove the redirect code, access your website’s .htaccess file or the server configuration file and delete the lines of code that contain the redirect instructions.
Q9: What challenges can I expect when changing domain names?
A9: When changing domain names, you may face challenges such as updating all internal and external links, notifying search engines of the change, and ensuring a smooth transition for users.
Q10: How do I handle backlinks pointing to the old URL?
A10: To handle backlinks pointing to the old URL, you can reach out to the linking websites and request them to update the links. Alternatively, you can implement a 301 redirect to ensure the link equity is passed to the new URL.