404 errors can occur due to various reasons, such as deleted or moved web pages, incorrect URL structures, outdated or broken links, or server configuration issues.
What are 404 Pages?

404 pages, also known as “not found” errors, are web pages that are displayed when a user tries to access a page that does not exist or has been moved. When a visitor clicks on a broken link or enters an incorrect URL, the server responds with a 404 error code, indicating that the requested page is not available. These errors can occur for various reasons, such as deleted or renamed pages, outdated links, or incorrect URL structures.
It is important to address 404 errors promptly because they can negatively impact the user experience and harm your website’s ranking on search engines like Google. When search engine bots encounter a 404 page, they may assume that the website is not well-maintained or that the content is no longer relevant. As a result, the affected pages may not be indexed, and your website’s visibility in search results may be compromised.
To prevent 404 errors from affecting your website’s performance, it is crucial to regularly monitor and remove these pages from Google’s index. By doing so, you can ensure that your visitors have a seamless browsing experience and improve your website’s overall SEO performance. In the following sections, we will discuss various methods to identify and remove 404 pages, as well as provide step-by-step instructions on how to use Google Search Console to monitor and prevent future errors.
Remember, keeping your website free from 404 errors is an ongoing process that requires regular maintenance and attention. By proactively addressing broken links, redirecting URLs, and customizing your 404 page, you can enhance user satisfaction, improve search engine visibility, and maintain a well-optimized website.
Why Should You Remove 404 Pages?

Removing 404 pages from your website is crucial for several reasons:
1. Improved User Experience: When visitors encounter a 404 error, it can be frustrating and lead to a poor user experience. By removing these pages, you ensure that users can navigate your website seamlessly without encountering dead ends or broken links.
2. Enhanced SEO Performance: Search engines like Google prioritize websites that provide a positive user experience. If your website has numerous 404 pages, search engine bots may view it as poorly maintained or outdated, which can negatively impact your rankings. By removing 404 pages, you improve your website’s overall SEO performance and increase the likelihood of higher search engine rankings.
3. Preserved Link Equity: Each page on your website carries a certain amount of link equity or authority. When a page returns a 404 error, the link equity associated with that page is lost. By removing 404 pages and redirecting them to relevant pages, you can preserve and consolidate the link equity, ensuring that your website maintains a strong online presence.
4. Reduced Bounce Rate: High bounce rates, which occur when visitors quickly leave your website after encountering a 404 error, can negatively impact your website’s performance. By removing 404 pages, you decrease the likelihood of visitors bouncing off your site, improving engagement and increasing the chances of converting them into customers.
Removing 404 pages is essential for providing a seamless user experience, improving search engine visibility, preserving link equity, and reducing bounce rates. By following the methods outlined in this article, you can effectively identify and remove these pages from your website, ensuring optimal performance and user satisfaction.
How to Identify 404 Pages

To identify 404 pages on your website, you can use various methods and tools. Here are a few steps you can follow:
1. Utilize Google Analytics: Google Analytics provides valuable insights about the pages on your website that are generating 404 errors. By navigating to the “Behavior” section and selecting “Site Content” and then “All Pages,” you can filter the results to display only the pages with a “/404” URL. This will show you a list of the 404 pages on your site along with the number of times they have been accessed.
2. Check server logs: Server logs contain detailed information about the requests made to your website. By analyzing these logs, you can identify the URLs that are generating 404 errors. Look for entries that include the 404 status code and review the corresponding URLs to determine which pages need attention.
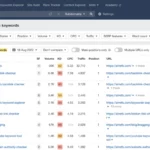
3. Use online tools: There are several online tools available that can help you identify 404 pages on your website. These tools crawl your site and generate a report highlighting any broken links or pages that return a 404 error. One popular tool is Screaming Frog, which provides a comprehensive analysis of your website’s URLs and identifies any errors.
4. Conduct manual checks: Manually checking your website for broken links can also help identify 404 pages. Go through your website’s navigation menu, internal links, and external links to ensure they are functioning correctly. Additionally, review any error reports or feedback from users to identify specific pages generating 404 errors.
By regularly identifying and addressing 404 pages, you can improve the user experience on your website and maintain a healthy SEO performance. Keep in mind that it is important to fix broken links, redirect URLs, or update the content to ensure that visitors are directed to the correct pages on your site.
Methods to Remove 404 Pages

There are several methods you can employ to remove 404 pages from your website and ensure a smooth browsing experience for your visitors. First, you can fix the broken link by locating the page that is generating the error and correcting the URL or updating the link. This will redirect users to the correct page instead of encountering the 404 error. Another option is to redirect the URL to a relevant page on your website using a 301 redirect. This will automatically send users to the appropriate page and prevent them from seeing the 404 error. Lastly, you can customize the 404 page itself to provide helpful information to users and guide them back to the main website. By implementing these methods, you can effectively remove and prevent 404 errors from impacting your website’s performance and search engine ranking.
1. Fix the Broken Link
To fix a broken link that is resulting in a 404 error, you need to identify the specific URL that is causing the issue. This can be done by reviewing your website’s analytics or using tools like Google Search Console. Once you have identified the broken link, you have a few options to fix it.
Option 1: Update the Link: If the page that the broken link is pointing to still exists but has been moved or renamed, you can update the link to the correct URL. This can be done by editing the HTML code or content management system (CMS) of your website. Make sure to update all instances of the broken link to ensure a seamless user experience.
Option 2: Redirect the URL: If the page no longer exists or has been permanently removed, you can set up a 301 redirect to redirect users to a relevant page on your website. A 301 redirect is a permanent redirect that notifies search engines that the page has moved to a new location. This helps preserve the SEO value of the original page and ensures that visitors are directed to a useful alternative page.
Option 3: Remove the Link: If the broken link is no longer relevant or necessary, you can simply remove it from your website. This ensures that users are not directed to a non-existent page and prevents search engines from crawling and indexing the broken link.
By fixing broken links, you not only eliminate 404 errors but also improve user experience and prevent potential negative impacts on your website’s SEO performance. Remember to regularly monitor your website for broken links and promptly address them to maintain a seamless browsing experience for your visitors.
2. Redirect the URL
Redirecting the URL is another effective method to remove 404 pages from Google’s index. When a page has been moved or renamed, you can set up a redirect to automatically send users to the new location. This ensures that visitors who access the old URL are seamlessly redirected to the relevant page, eliminating the need for them to encounter a 404 error.
To redirect a URL, you can use a 301 redirect, which is a permanent redirect that informs search engines that the page has been permanently moved to a new location. This redirect passes the link equity and ranking signals from the old URL to the new one, helping to maintain your website’s SEO value.
There are several ways to implement a 301 redirect. One option is to modify the .htaccess file on your server if you are using an Apache web server. You can add a line of code to the .htaccess file that specifies the old URL and the new destination URL. This tells the server to redirect any requests for the old URL to the new URL.
Another option is to use a redirect plugin if you are using a content management system (CMS) like WordPress. These plugins provide an easy-to-use interface where you can set up redirects without needing to modify any server files. Simply enter the old URL and the new destination URL, and the plugin will handle the redirect for you.
When setting up redirects, it is important to redirect to the most relevant page on your website. This ensures that users are directed to the content they are looking for, reducing the chance of encountering a 404 error. Additionally, you should test the redirects to ensure they are functioning correctly and that visitors are being redirected as intended.
Redirecting the URL is an effective method to remove 404 pages from Google’s index. By setting up proper redirects, you can improve the user experience, maintain your website’s SEO value, and eliminate the presence of 404 errors on your site.
3. Customize the 404 Page
Customizing the 404 page is an effective way to improve the user experience when visitors encounter a broken link or navigate to a non-existent page on your website. By designing a customized 404 page, you can provide helpful information, guide users back to relevant content, and even inject some creativity into the error message.
When customizing your 404 page, there are a few important elements to consider. Firstly, make sure to include a clear and friendly error message that informs visitors that the page they are looking for cannot be found. This message should be displayed prominently on the page, using attention-grabbing formatting or design elements like bold text or highlighted colors.
Additionally, it’s a good idea to provide alternative navigation options or a search bar to help users find what they are looking for. This can include links to popular pages, categories, or a site-wide search functionality. By offering easy navigation options, you can encourage visitors to explore other parts of your website and reduce the chances of them leaving frustrated.
Consider adding a touch of personality or branding to your 404 page. This can be done through the use of engaging visuals, clever copywriting, or even incorporating your company’s logo and colors. By making the 404 page visually appealing and aligned with your brand, you can turn a potentially negative experience into a positive one, leaving a lasting impression on your visitors.
To implement a customized 404 page, you will need to modify the HTML or CMS template of your website. Depending on the platform you are using, there may be different methods to achieve this. For example, if you are using WordPress, you can install a plugin like “404page” that allows you to easily create and customize your own error page.
By customizing the 404 page, you not only provide a better user experience but also have the opportunity to retain visitors who may have otherwise left your site. By adding relevant internal links and enticing content, you can redirect users to other pages on your website and keep them engaged. This can ultimately contribute to improving your website’s overall bounce rate and user satisfaction.
So, take the time to personalize your 404 page and transform it into an opportunity to engage with your audience. With a well-designed and informative error page, you can turn a frustrating experience into a positive one, and ensure that your visitors stay on your website longer, increasing the chances of conversions and customer retention.
Remember, a customized 404 page should align with your brand’s voice and aesthetics while providing a helpful and user-centric experience. By following these guidelines, you can create a memorable and effective 404 page that enhances your website’s overall user experience.
Using Google Search Console
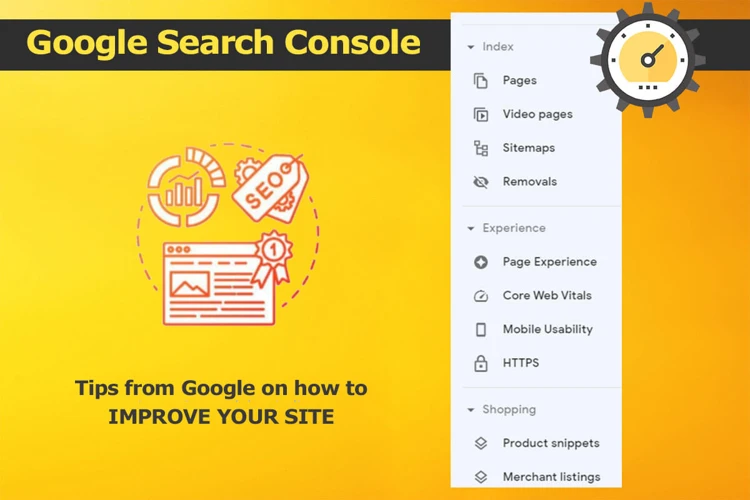
Using Google Search Console is an effective way to monitor and manage 404 errors on your website. To begin, you need to add and verify your website in the Search Console. Once verified, you can access the Coverage Report, which provides detailed information about the indexing status of your pages. In this report, you can easily identify any pages that are returning 404 errors. To remove these pages from the Google index, you can submit a removal request through the Search Console. This ensures that the 404 pages are no longer displayed in search results, improving the overall user experience. By regularly monitoring your website through Google Search Console, you can stay on top of any 404 errors and take proactive steps to fix them, ultimately improving your website’s visibility and performance in search engine rankings.
1. Add and Verify Your Website
To begin using Google Search Console to monitor and remove 404 pages, you first need to add and verify your website. Follow these steps to get started:
Step 1: Sign in to your Google account and navigate to the Google Search Console website.
Step 2: Click on the “Add a Property” button and enter the URL of your website. Make sure to enter the exact URL that you want to monitor for 404 errors.
Step 3: Choose a verification method. Google offers several options such as HTML file upload, HTML tag, domain name provider, or Google Analytics. Select the method that is most convenient for you.
Step 4: Follow the instructions provided by Google to complete the verification process. This may involve uploading an HTML file to your website’s root directory, adding a meta tag to your website’s HTML code, or making DNS changes through your domain name provider.
Step 5: Once the verification is complete, Google will start gathering data about your website’s performance and indexing status. It may take some time for the data to populate in your Search Console account.
By adding and verifying your website in Google Search Console, you gain access to valuable information about how Google sees your website and any issues it may have, including 404 errors. This is the first step in effectively monitoring and managing the presence of 404 pages in Google’s index.
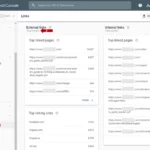
2. Access the Coverage Report
To access the Coverage Report in Google Search Console, follow these steps:
1. Log in to your Google Search Console account.
2. Select the website property you want to work with, if you have multiple properties.
3. On the left-hand side menu, click on “Coverage.”
4. This will take you to the Coverage Report, which provides an overview of the indexed pages on your website and any issues that Google has encountered.
In the Coverage Report, you will see a breakdown of the pages that are indexed, as well as any pages that have errors or are excluded from indexing. This report is a valuable resource for identifying and addressing 404 errors on your website.
By analyzing the Coverage Report, you can identify specific pages that are returning a 404 status code and take appropriate action to resolve the issue. This may involve fixing broken links, redirecting URLs, or updating your website’s structure. Additionally, the report can highlight any other indexing issues that may be affecting your website’s performance in search results.
It is worth noting that the Coverage Report provides valuable insights into the overall health of your website’s indexability. By regularly accessing this report, you can stay on top of any 404 errors or other indexing issues that may arise and take immediate steps to resolve them, ensuring that your website remains accessible and visible to both users and search engines.
To learn more about fixing indexing issues and improving your website’s overall SEO performance, you can check out our article on “How to Fix ‘Discovered – Currently Not Indexed’ Pages.”
3. Identify 404 Errors
To identify 404 errors on your website, you can utilize Google Search Console. Follow these steps to find and address these errors:
Step 1: Add and Verify Your Website
If you haven’t already, you need to add your website to Google Search Console and verify ownership. This process involves adding a meta tag or uploading an HTML file to your website’s root directory.
Step 2: Access the Coverage Report
Once your website is verified, navigate to the Google Search Console dashboard and select your website from the property list. Then, click on “Coverage” in the left-hand menu. The Coverage report provides an overview of the indexed pages on your website and any errors encountered.
Step 3: Identify 404 Errors
In the Coverage report, look for the “Error” section. Here, you will find a list of pages that are returning 404 errors. The report will display the specific URL of the page along with a brief description of the error. You can click on each error to view more details.
Step 4: Request Removal from Index
To address the 404 errors, you have two options. If the page no longer exists and you don’t plan to bring it back, you can request removal from Google’s index. To do this, click on the specific URL in the Coverage report, and then click on the “Request Removal” button. Keep in mind that this process may take some time, and the page will still be accessible to users.
Alternatively, if the page has moved or has a new URL, you can redirect the old URL to the new one. This will ensure that visitors who access the old URL are automatically redirected to the new page.
By regularly monitoring the Coverage report in Google Search Console, you can stay on top of any 404 errors on your website and take the necessary steps to address them. This proactive approach will help improve the user experience, maintain a healthy website, and boost your SEO efforts.
Internal link: how to remove 301 redirect
4. Request Removal from Index
To further ensure that removed 404 pages are no longer indexed by Google, you can request their removal using the Google Search Console. Here’s how you can do it:
- Log in to your Google Search Console account and navigate to the property that contains the 404 pages you want to remove.
- Click on the “Index” tab in the left-hand sidebar and select “Removals.”
- Click on the “New Request” button.
- Enter the URL of the 404 page you want to remove in the provided field.
- Choose the removal type as “Temporary Removal” or “Outdated Content” depending on the situation.
- Click on the “Submit Request” button to submit your removal request.
It’s important to note that the removal request is temporary and does not guarantee immediate removal from Google’s index. The search engine will process your request and update its index accordingly. You can track the status of your removal request in the Google Search Console.
By requesting removal from the index, you can expedite the process of removing 404 pages from Google’s search results. This helps ensure that users will no longer encounter these non-existent pages when they search for your website. Remember to regularly monitor your website for any new 404 errors and promptly address them to maintain a seamless user experience and optimize your website’s performance in search engine rankings.
Monitoring and Preventing 404 Pages
To effectively monitor and prevent 404 pages on your website, it is essential to implement proper strategies and practices. Firstly, regularly monitoring your website for broken links and outdated URLs is crucial. Conducting periodic audits using tools like Google Search Console or third-party software can help identify any 404 errors. Secondly, setting up proper redirects is important to ensure that users are directed to the correct pages when they encounter broken links. Implementing 301 redirects or using plugins can help automatically redirect users to the relevant pages. Lastly, keeping your sitemap updated is vital for search engines to crawl and index your website correctly. By regularly submitting an updated sitemap to search engines, you can help prevent 404 errors. By following these steps, you can effectively monitor and prevent 404 pages, improving user experience and maintaining a well-optimized website.
1. Regularly Monitor Your Website
Regularly monitoring your website is essential in identifying and addressing 404 errors. By staying proactive, you can quickly detect any broken links or missing pages and take necessary actions to resolve them. Here are some steps you can follow to effectively monitor your website:
1. Conduct Regular Site Audits: Perform regular audits of your website to identify any broken links or pages. Use website auditing tools or plugins to scan your site for errors and generate reports highlighting any 404 pages that need attention.
2. Check Website Analytics: Analyze your website’s analytics data to identify any pages that have a high number of 404 errors. Look for patterns or trends that may indicate underlying issues, such as outdated links or incorrect redirects.
3. Set up Alerts: Configure alerts or notifications to receive updates whenever a 404 error is detected on your website. This way, you can promptly address the issue and prevent further negative impacts.
4. Regularly Test Internal and External Links: Regularly test all internal and external links on your website to ensure they are functioning correctly. If you find any broken links, update or remove them to prevent 404 errors.
5. Monitor Website Changes: Keep track of any changes made to your website, such as page deletions or URL modifications. This will help you identify potential 404 errors that may arise from these changes.
6. Utilize Website Monitoring Tools: Take advantage of website monitoring tools that can automatically check your website for broken links and other errors. These tools can provide detailed reports and alerts to help you address 404 errors promptly.
By regularly monitoring your website, you can identify and resolve 404 errors before they negatively impact user experience and search engine rankings. It’s important to stay proactive and make necessary updates to keep your website running smoothly.
2. Set Up Proper Redirects
Setting up proper redirects is an essential step in managing and preventing 404 errors on your website. Redirects allow you to automatically send users and search engines from one URL to another, ensuring that they reach the intended page even if the original URL is no longer valid. Here are some key points to consider when setting up redirects:
1. Choose the Right Redirect Type: There are different types of redirects, but the most commonly used for handling 404 errors is the 301 redirect. A 301 redirect indicates that the requested page has permanently moved to a new location. This redirect type not only sends users to the correct page but also informs search engines that the original URL has been permanently replaced. By using a 301 redirect, you can transfer the SEO value and ranking power from the old URL to the new one, helping to maintain your website’s visibility in search results.
2. Determine the Destination URL: When setting up a redirect, it’s important to choose the appropriate destination URL. Ideally, you should redirect the user to a page with similar or relevant content to the original page. This ensures a seamless user experience and helps search engines understand the context of the redirect. If the original page no longer exists and there is no relevant alternative, you can redirect users to the homepage or another relevant section of your website.
3. Implement the Redirect: To set up a redirect, you will need to access your website’s server or content management system (CMS). Depending on your platform, the process may vary, but most CMS platforms have built-in redirect functionality. Alternatively, you can use plugins or code snippets to create redirects. Ensure that you correctly implement the redirect code to avoid any technical issues or errors that could disrupt the user experience or the search engine crawling process.
4. Test and Monitor the Redirect: After setting up a redirect, it’s essential to test it thoroughly to ensure it functions as intended. Check that the redirect sends users to the correct page and that the redirected URL is properly indexed by search engines. Additionally, regularly monitor your website for any new 404 errors that may arise and promptly address them by setting up appropriate redirects.
By setting up proper redirects, you can effectively manage 404 errors and ensure that users and search engines can access the correct pages on your website. Redirects not only help maintain a positive user experience but also contribute to your website’s overall SEO performance.
3. Keep Your Sitemap Updated
Keeping your sitemap updated is crucial in ensuring that search engines can efficiently crawl and index your website’s pages. A sitemap is a file that lists all the URLs on your site and provides important information about each page, such as its priority and last modified date. By regularly updating your sitemap, you can help search engines discover new content and remove outdated or non-existent pages from their index.
To keep your sitemap updated, follow these steps:
1. Generate a sitemap: Use a sitemap generator tool or a plugin if you’re using a content management system like WordPress. These tools will automatically create a sitemap for your website.
2. Submit your sitemap to search engines: Once you have generated your sitemap, submit it to search engines like Google through their respective webmaster tools. This allows search engines to access and understand the structure of your website.
3. Regularly update your sitemap: As you add new pages or make changes to your website, update your sitemap accordingly. This ensures that search engines are aware of the latest content and can index it promptly.
4. Check for errors: Periodically review your sitemap for any errors or broken links. Fix any issues to ensure that search engines can crawl and index your pages effectively.
5. Monitor changes: Keep track of any changes to your website’s structure or URL redirects. Update your sitemap to reflect these changes to ensure that search engines can access the correct URLs.
By keeping your sitemap updated, you enhance the chances of search engines discovering and indexing your website’s pages accurately. This, in turn, improves your website’s visibility in search results and helps prevent 404 errors from affecting your SEO efforts. Remember to regularly monitor and update your sitemap to maintain a well-optimized website that is easily accessible to both users and search engines.
For more information on SEO growth forecasting, you can refer to our article on how to forecast SEO growth.
Conclusion
In conclusion, removing 404 pages from Google’s index is crucial for maintaining a high-quality website and improving search engine visibility. By addressing broken links, redirecting URLs, and customizing your 404 page, you can enhance the user experience and prevent negative impacts on your website’s ranking. Google Search Console provides a valuable tool for identifying and monitoring 404 errors, allowing you to take proactive measures to fix them. Regularly monitoring your website, setting up proper redirects, and keeping your sitemap updated are essential steps in preventing 404 errors from occurring. By following these steps and consistently maintaining your website, you can ensure that your visitors have a seamless browsing experience and improve your overall SEO performance. Remember, a well-optimized website is crucial for attracting and retaining users, so take the necessary steps to remove 404 pages and keep your website in top shape.
Frequently Asked Questions
What causes 404 errors?
404 errors can occur due to various reasons, such as deleted or moved web pages, incorrect URL structures, outdated or broken links, or server configuration issues.
How do 404 errors affect my website?
404 errors can harm your website’s user experience by displaying an error page instead of the intended content. They can also negatively impact your website’s ranking on search engines and result in pages not being indexed or displayed in search results.
How can I identify 404 errors on my website?
You can identify 404 errors by regularly monitoring your website’s error logs, using online tools or plugins that detect broken links, or by checking your website’s Google Search Console for crawl errors.
Can I fix 404 errors by redirecting the URL?
Yes, redirecting the URL of a 404 page to a relevant and existing page can help resolve the error. This ensures that users are redirected to the correct content and search engines can update their indexes accordingly.
What is the best way to fix broken links?
The best way to fix broken links is to update the links with the correct URLs. You can do this by manually editing the links on your website or by using plugins or tools that automatically update broken links.
Should I customize my 404 page?
Customizing your 404 page can improve the user experience by providing helpful information, such as a search bar or links to popular pages, and guiding visitors back to relevant content on your website.
How do I add and verify my website in Google Search Console?
To add and verify your website in Google Search Console, you need to sign in to your Google account, click on “Add a property,” enter your website’s URL, and follow the verification process provided by Google.
What is the Coverage Report in Google Search Console?
The Coverage Report in Google Search Console provides an overview of how Google is crawling and indexing your website’s pages. It displays information about valid pages, indexed pages, and any errors or issues encountered during the crawling process.
How do I request removal of a 404 page from Google’s index?
To request the removal of a 404 page from Google’s index, you can use the URL Removal Tool in Google Search Console. Simply enter the URL of the page you want to remove, select the appropriate removal type, and submit your request.
How can I prevent future 404 errors?
To prevent future 404 errors, regularly monitor your website for broken links, set up proper redirects for moved or renamed pages, and keep your sitemap updated to ensure search engines can easily crawl and index your website’s content.